An Introduction To KaboomJS
Kaboom is a JavaScript framework for making web games.
Here is some advice on getting started with Kaboom.
Kaboom mainly uses functions called “components”. You load an asset, like a sprite, declare it into a variable with an array of components and “spawn” it into the game scene where it becomes a “game object”.

 Certain components “unlock” further components for more behaviours and properties. For example
 area() enables body() which enables jump().
area() > body() > jump()
If you get an error like “jump() is not a function” then it may be because jump() has not been enabled by another component like area().
The Kaboom website is like a one-page site with all the documentation. Head to the Playground to jump straight in to the demos and then use the website’s search feature to explain unfamiliar components.
How to interpret the syntax pseudocode in the docs.
It may not be clear how to read the docs. Let’s look at components. This is the text() compnent.
text(txt: string, conf?: TextCompConf) => TextComp
When a component takes an argument, it is written as a label and a data type. For example, the component text() takes the argument txt which is a string to set the displayed text.
Some components take a configuration object which configures the game object when it is declared, for example conf. A “?” indicates the argument is optional and can be left out. In the docs, click the config object link to open the flyout panel to see what properties can be configured.
When you assign a game object to a variable let player = add([...]) you can use the corresponding modification object to modify the game object after it is spawned. After the arrow “=>” is the modification object. This is what the component returns and this enables the extra behaviours.
Most entries are properties and are set like gmobj.keyname = value. If they have parentheses they are methods. Some methods return information, like player.pos(), and some methods take further arguments.
Some enable more components.
Example
area(options: AreaCompOpt) => AreaComp
area() defines a game object’s collider area, or hitbox, and enables collision detection. When area() is applied with no arguments, the hitbox of the game object defaults to its visible area. With a sprite, this will be the dimensions of the source image.
area() can take a configuration object, here labelled “options”, as defined by “AreaCompOpt”. The width and height properties alter the hitbox area({width: 20, height: 20}). This is set when the game object first spawns into the game scene.
The modification object called “AreaComp” defines the properties and methods a game object can use after it is spawned. For example, .onClick() can run an event when the game object is clicked and takes a function. player.onClick(() => {addKaboom()}).
Demos
I suggest looking at the demos in this order:
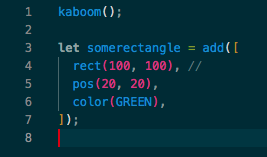
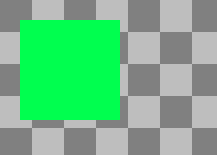
rect(). Using the built-in geometry primitives do not require loading in images for sprites.loadBean(). Kaboom has a built-in sprite. This is Bean the human being.rotate()- A button. Notice
wave()with colour. This uses a custom component. - Silliness built-in
- Collision. Notice the adventure game movement controls,
solid(), using a regular for-loop withadd()to spawn many game objects, the built-in debug tools.move()requirespos(). - A platformer game.
jump()requiresbody()which requiresarea(). Notice the level map, the “player” tag, the score system, and how the camera follows the player. - Endless runner game. Notice there are no sprite animations.
- Sprite atlas. Notice the game objects are animated with a sprite atlas and interact. This has a fancy way of handling multiple level maps.
As a reminder, when you want to see something onscreen you use add([]) and it becomes a game object. add() takes an array and you throw in components to configure the game object. When you assign add() to a variable it behaves like a regular JS object and you can attach properties and methods to it. This way you can alter the behaviour of the game object within event components and the game object onscreen can react to things AFTER it is spawned.
More Resources
In Sept 2022 Kaboom version 3 was released. The version naming convention was also changed to thousands for a joke.
- Some examples of the major new features in version 3000
- A guide to migrating from version 2000 to 3000
- For some reason there are some extra tips hidden in the GitHub repo
- JSLegendDev has tutorials on Youtube and hangs out in the Discord. Cool guy.
- The docs for Replit have a section on Kaboom with links to more examples but it uses an old version
- Ourcade has a series but uses an old version
- FreeCodeCamp has a series but uses an old version
A Workflow For Experimenting
My preference is to generate boilerplate files with a Bash script. I want the JS in a separate file to benefit from my IDE’s syntax highlighting + helpful features. I use GitHub as a primitive CDN If I want to share an experiment or finished playable game I stick it in Replit. But it cant take my GitHub resources. This is an issue I have not yet solved.
Kaboom takes level maps in an interesting way. It uses single character symbols to arrange tiles in a grid. Tiles can be animated. Tiles can set the player spawn point. For simple levels I use Google Sheets and export to .csv, then run a simple Bash script to add quotes and commas. For more complicated tile maps there are tools like Tiled I create pixel art with Photopea. See my guide on pixel art. However, Kaboom does support a pixel art tool called Aseprite.
Thoughts And Theory
I love games and really wanted to make one. 2D games are simple and learning to make web games involves learning to make websites anyway. Transferable skills!
I have dabbled with a few web game frameworks like Phaser but struggled to get my head around JS classes to use Phaser “properly”. I like Kaboom because it is mainly based on functions. It has goofy example demos. It has a dedicated burp mode. It has a friendly community. The creator sometimes answers people’s questions. Someone told me how to recreate the game camera from Zelda.
I discovered Kaboom when I was exploring Python and gave up trying to install it on my Mac without borking the system Python, so I turned to an online editor called Replit. A Replit staff member created Kaboom and I saw its announcement on the Replit company blog. Now when you start a Replit project and choose Kaboom as the framework you get extra tools specially for Kaboom in the UI.
By the way, Replit has an app so I am convinced that it’s possible to program a Kaboom game on a mobile phone from scratch. It may not be comfortable, but it is possible.