This short, opinionated guide will cover using AWS, SSH, PHP and MySQL. It assumes some knowledge of the command line.
Contents
- AWS
- Setup. server remote access, database, PHP, Adminer
- Your dev env, files, permissions, Hello World
- more dev env, IDE, better remote access
- A basic HTML form example
- What’s Next
Setting up your Amazon EC2 instance
Account And Setup
Amazon offers cloud hosting services through Amazon Web Services (AWS) and there is a pretty long free trial period for new users. There is a dizying variety of services but for a playground server suitable for running PHP we want Elastic Cloud (EC2).
If you’re curious you can look into the technology behind AWS, instead of leasing disk space on physical computers it uses virtual servers which makes it easier for large websites to quickly react to sudden spikes in traffic by hiring more computer power when needed, hence why it is called “Elastic” Cloud.
Visit Amazon Web Services and create an account. It asks for bank card details but if you select a product in the free tier you won’t be charged for your first year. There are instructions for registering on the site, in the AWS docs and in the confirmation emails along the way.
Log in to the AWS site to you see your username beside the bell icon. If you are logged out, press the orange button “Sign in to console”
In the top-right of the nav bar left of “Support” is a geographic region. Click this to change your region to nearer your location, for example Ireland if in Europe. This is not a crucial.
In the top-left of the nav bar click ‘Services’ then ‘EC2’, or search for “EC2” in the search bar. Click Launch Instance
Select “Ubuntu Server 18.04 LTS, 64-bit (x86)”
Choose the “General Purpose t2.micro” option (it should say “Free tier eligible” in green).
Click ‘Review and Launch’, then ‘Launch’. It may take a few minutes for Amazon to approve your launch request. Check your emails and have patience.
You’ll be asked to set up a “SSH key pair”. These are files to help you connect to the server, more on this later. Select ‘Create a new pair’ and hit ‘Continue’, then download the file. Don’t lose this file or you will have to create a new server instance.
Tips: For the tiny experimental webapps you will make it is highly unlikely you will go over the usage limit. Keep it that way to avoid being charged. Luckily the account settings has a “budget” feature so you can set your spend limit to £0.01 and it will automatically stop the server instance if goes over that and emails you if it gets near. Also do not launch a second server instance
Security
Now we add security rules so when we make the web pages they will be accessible by anyone with a browser.
In the navigation pane choose ‘Security Groups’, select ‘Create Security Group’. Give it a name and a description. Click ‘Add Rule’.
Enter the following rule settings:
| Type | HTTP |
|---|---|
| Protocol | TCP |
| Port range | 80 |
| Source | anywhere |
Click ‘Create’.
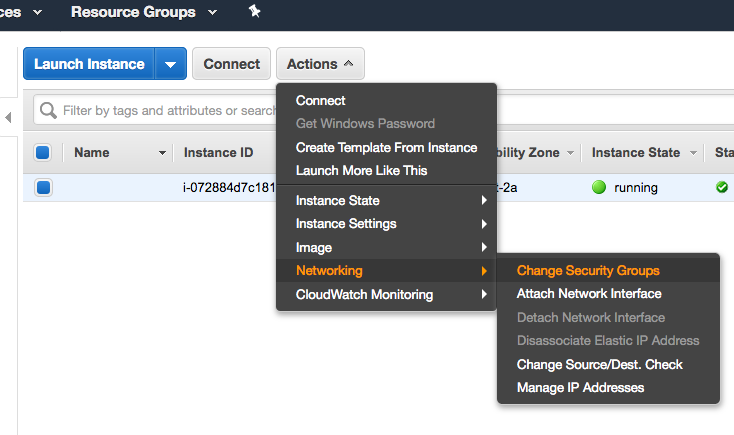
Then we need to assign that rule to our server instance. Back in the side menu select ‘Instances’. Tick your instance.
Go to ‘Actions’, then ‘Networking’, then ‘Change Security Groupsæ. Tick your security group and ‘Apply’. You should now be able to connect to your instance.
Make sure you DON’T disable the existing ticked Security Groups (those are the ones that let you SSH into the server) i.e. install-wizard.